Stripes: DIY
Stripes or chevron patterns are great to highlight small walls that aren’t always in your line of sight. Be careful not to choose a wall that is highly visible because these lines can be dizzying and you’ll be ready to get rid of it as soon as you’re done applying.
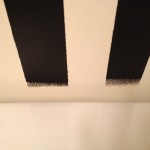
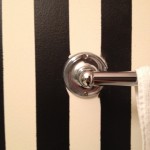
In my New York apartment there was a small wall in the front entrance that I covered in black and white striped wallpaper. This was my first experience with wallpaper; after it was complete (with bubbles) I decided I’d hire someone for my next encounter with wallpaper. In my San Francisco condo I decided to paint the stripes in the bathroom myself – this was actually easier than wallpaper. I decided on 2 inch stripes because I could use 2 inch masking tape to lay the lines. Keep reading for my instructions on painting or check out tips on wallpapering and doityourself.com for some wallpaper guidance.
Steps to painting black and white stripes (assuming the original color of the wall will be the color of one of your stripes – in this case, white):
Preparation: You’ll need masking tape, black paint, paint brushes, a pencil, a ruler, and a tarp for spills.
Step 1: If the wall has anything on it, such as a towel rack, try to remove it before you start so it doesn’t disrupt your lines. If you can’t remove it, cover it in tape.
Step 2: Measure the width of the wall to figured out how big your first stripe should be so that the final stripe won’t be uneven. For example, if your wall is 13 inches wide, you would have 5 2-inch rows (3 black and 2 white) with 3 inches left over. In this case, you would make the first white stripe 1.5 inches wide so the final white stripe would also be 1.5 inches.
Step 3: Use a ruler to measure 1.5 inches (or the width you calculated) from the mirror and make a tick-mark with your pencil at the top, middle, and the bottom of the wall. You want to measure it on various points down the wall so you can guide the tape and you don’t lay it crooked. Lay the tape directly adjacent to the mirror (or other wall) so that the first stripe is white and you won’t risk getting black paint on the mirror. Keep in mind, the area covered in tape will be your white stripes.
Step 4: Use a ruler to measure 2 inches from the first row of tape and make tick-marks on the top, middle, and bottom of the wall. Carefully lay your second row of tape. Repeat until the end of the wall.
Step 5: Paint 2 coats of black paint over the stripes (you can get paint at home depot). IMPORTANT: wait for the paint to fully dry before you remove the tape.
Step 6: Touch it up. Use a sponge to gently blend any imperfections. Your stripes may not be perfect, but don’t worry, it was a cool DIY project.
Take pictures and send them to designtrov@gmail.com


0 Comments